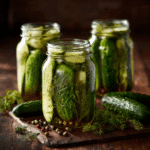
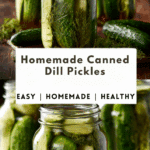
Put all those garden cucumbers to good use with this Homemade Canned Dill Pickles recipe. I get crunchy, flavorful pickles every time, and with the proper canning method, I can keep them shelf-stable for months.
Why You’ll Love This Recipe
I love this recipe because it takes my summer cucumber harvest and transforms it into something I can enjoy year-round. The pickles come out crisp, tangy, and infused with a garlicky dill flavor that’s just unbeatable. While it takes a bit more effort than quick refrigerator pickles, the water bath method makes them shelf-stable, which is incredibly convenient. Plus, I always feel a bit proud seeing those perfectly sealed jars lined up in my pantry.
Ingredients
(Here’s a tip: Check out the full list of ingredients and measurements in the recipe card below.)
pickling cucumbers
dill seed
mustard seed
whole cloves of garlic
whole peppercorns
water
white vinegar
pickling salt or kosher salt (non-iodized)
sugar
Directions
Sanitize the jars
I begin by boiling the glass mason jars and lids for a few minutes to sanitize them thoroughly. This step ensures the pickles stay safe and fresh for long-term storage.
Prep the cucumbers
I wash the cucumbers and trim off the flowering ends. That little tip can release an enzyme that causes soft pickles over time, so I make sure to remove it for maximum crunch.
Add spices to the jars
I add a mix of dill seed, mustard seed, garlic cloves, and peppercorns to each jar before packing in the cucumbers.
Make the brine
In a pot, I bring water, vinegar, sugar, and salt to a boil until the solids dissolve completely. Then, I pour the hot brine into each jar, leaving about 1/2 inch of space at the top.
Seal and process in a water bath
After hand-tightening the lids (not too tight), I submerge the jars in a large pot of boiling water for 10 minutes. This seals them and makes them safe to store outside the fridge.
Cool and check seals
Once removed from the pot, I let the jars cool completely on the counter for 24 hours. I check the tops to make sure they’ve sealed properly before storing.
Servings and timing
This recipe makes about 6–8 pint-sized jars of pickles.
Prep time: 30 minutes
Cook time: 10 minutes
Cooling/sealing time: 24 hours
Total time: 24 hours and 40 minutes
Variations
If I want a spicier batch, I sometimes add red pepper flakes or a slice of jalapeño to each jar. For a more herbaceous flavor, I’ve also tried adding fresh dill heads when available. If I’m short on cucumbers, I’ve swapped in green beans or carrot sticks for a fun twist.
storage/reheating
Once sealed and processed, I store the unopened jars in a cool, dark pantry for up to 1 year. I always write the date on the lid so I know how long they’ve been sitting. After opening, I keep the pickles in the fridge and try to use them within 7–10 days. There’s no reheating needed—just pop the jar open and enjoy.
FAQs
How do I know if my jars have sealed properly?
I press down on the center of the lid after cooling for 24 hours. If it doesn’t pop back up, the seal is good. If it does, I refrigerate and eat those pickles within a week.
Can I reuse the canning lids?
No, I always use new lids when canning to ensure a proper seal. I can reuse the jars and rings, but not the flat sealing lids.
What kind of vinegar is best for pickling?
I use white vinegar with 5% acidity. It gives the pickles that classic tang and ensures they’re safe for long-term storage.
Why do I have to remove the blossom end of the cucumber?
The blossom end contains enzymes that cause softening. Trimming it off helps my pickles stay crunchy for months.
Can I skip the sugar?
Yes, I can leave out the sugar if I prefer a more tart pickle. The sugar adds just a subtle sweetness and helps balance the vinegar flavor.
Conclusion
Making homemade canned dill pickles is one of my favorite ways to enjoy the summer harvest all year long. With a simple set of ingredients and a few canning basics, I get crisp, delicious pickles that are perfect for snacking, sandwiches, and sharing with friends. Once I made my first successful batch, I knew I’d never go back to store-bought.
PrintHomemade Canned Dill Pickles
Enjoy crisp, tangy Homemade Canned Dill Pickles all year long using this easy water bath canning method. This shelf-stable recipe is perfect for preserving your summer cucumber harvest with bold dill and garlic flavor.
- Prep Time: 30 minutes
- Cook Time: 10 minutes
- Total Time: 24 hours 40 minutes
- Yield: About 6–8 pint-sized jars
- Category: Canning & Preserving
- Method: Water Bath Canning
- Cuisine: American
- Diet: Gluten Free
Ingredients
- Pickling cucumbers
- Dill seed
- Mustard seed
- Whole cloves of garlic
- Whole peppercorns
- Water
- White vinegar (5% acidity)
- Pickling salt or kosher salt (non-iodized)
- Sugar (optional)
Instructions
- Boil jars and lids to sanitize thoroughly.
- Wash cucumbers and trim the blossom end.
- Place dill seed, mustard seed, garlic, and peppercorns into each jar.
- Boil water, vinegar, sugar, and salt until dissolved to make the brine.
- Pour hot brine into jars, leaving 1/2-inch headspace.
- Hand-tighten lids, then process in boiling water for 10 minutes.
- Cool jars for 24 hours and ensure seals are secure.
Notes
- To spice it up, add red pepper flakes or jalapeño slices.
- Try other veggies like green beans or carrot sticks for variety.
- Always use new canning lids for safety.
- Label jars with the canning date.
- Store opened jars in the fridge and consume within 7–10 days.
Nutrition
- Serving Size: 1 spear
- Calories: 5
- Sugar: 0g
- Sodium: 300mg
- Fat: 0g
- Saturated Fat: 0g
- Unsaturated Fat: 0g
- Trans Fat: 0g
- Carbohydrates: 1g
- Fiber: 0g
- Protein: 0g
- Cholesterol: 0mg

