Haunted Pumpkin Patch Cups are the ultimate Halloween treat—fun to make, spooky to serve, and incredibly tasty. These dessert cups layer rich chocolate pudding, crushed cookies, and sweet pumpkin candies to create a mini edible pumpkin patch that’s perfect for kids and adults alike.
Why I’ll Love This Recipe
I love how creative and festive these dessert cups are. They come together with simple ingredients, no baking required, and always bring smiles to everyone’s face. Whether I’m making them for a Halloween party or a fun night in, they’re just the right mix of spooky and sweet.
Ingredients
(Here’s a tip: Check out the full list of ingredients and measurements in the recipe card below.)
-
Instant chocolate pudding mix
-
Milk (for pudding)
-
Crushed chocolate sandwich cookies (like Oreos)
-
Whipped topping or whipped cream
-
Candy pumpkins (like mellowcreme pumpkins)
-
Green icing or candy vines (optional for decorating)
-
Clear plastic cups or dessert cups
Directions
-
I prepare the instant pudding by whisking the mix with cold milk according to the package instructions, then let it chill until set.
-
I crush the chocolate cookies in a zip-top bag or food processor until they resemble soil.
-
I spoon a layer of pudding into each cup, then a layer of crushed cookies, and repeat as desired to create dirt layers.
-
I top each cup with a final layer of cookie “soil” and place a few candy pumpkins on top to look like they’re growing in a haunted patch.
-
For extra detail, I pipe green icing around the pumpkins to resemble vines or leaves.
-
I refrigerate the cups until ready to serve.
Servings and timing
This recipe makes about 6–8 dessert cups, depending on the size. It takes around 10 minutes to prep and 10 minutes for the pudding to set, so everything is ready in 20 minutes.
Variations
Sometimes I swap the chocolate pudding for vanilla dyed orange to make it look more pumpkin-like. I also like to add gummy worms or tombstone cookies to turn the cups into full spooky graveyard scenes. For a more indulgent version, I layer in chocolate mousse or brownie crumbles.
Storage/Reheating
I store the assembled cups in the fridge for up to 2 days. If I’m making them ahead, I wait to add the cookie topping and decorations until just before serving to keep everything crisp and fresh. These don’t require reheating since they’re best served chilled.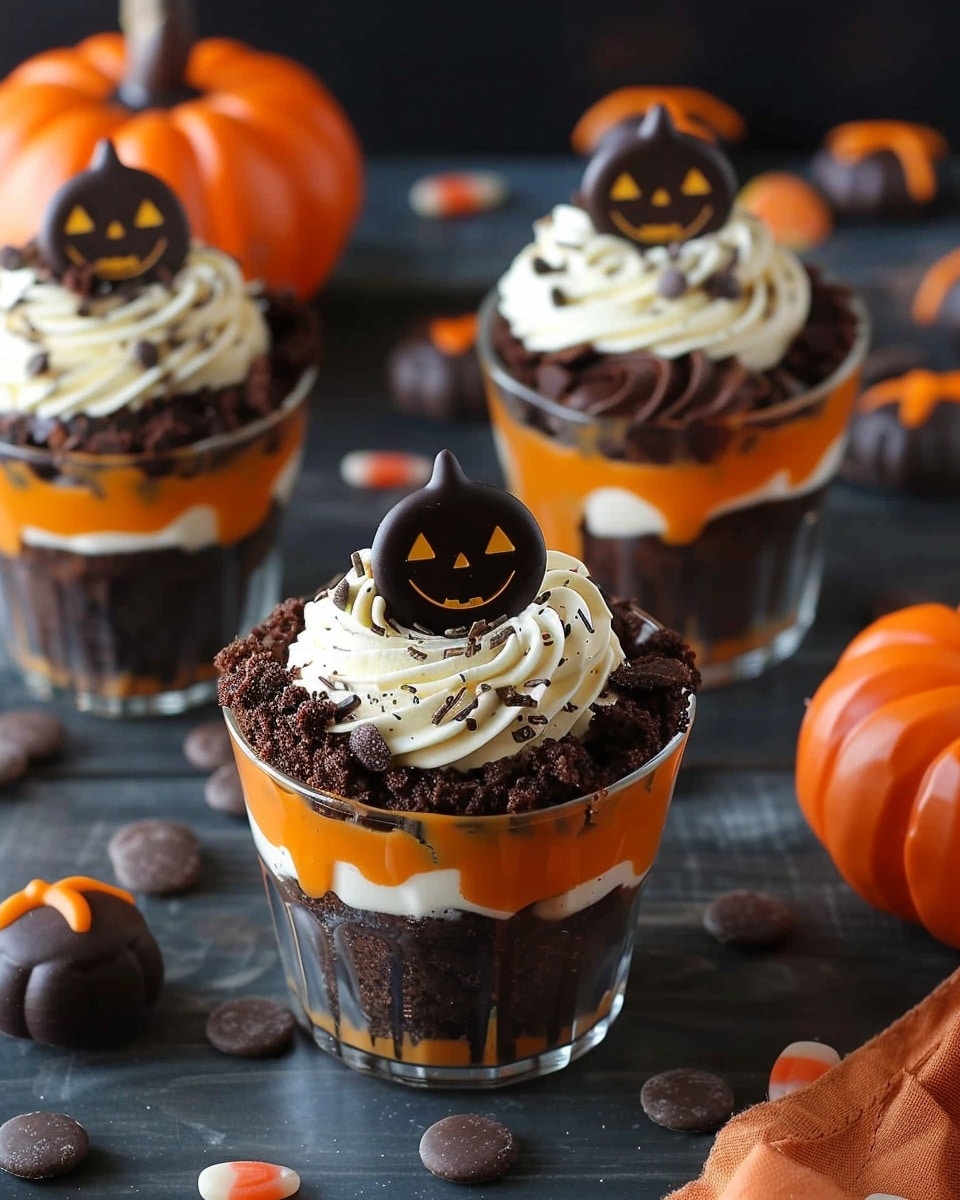
FAQs
Can I make these with homemade pudding?
Yes, I sometimes use homemade chocolate pudding if I have extra time. It adds a rich, from-scratch taste to the cups.
Can kids help make these?
Absolutely. This is a great hands-on activity—I let them layer the pudding and “dirt” and decorate with candy however they like.
What can I use instead of candy pumpkins?
If I don’t have candy pumpkins, I use orange jelly beans, fondant pumpkins, or even mini frosted cookies shaped like pumpkins.
Can I use dairy-free pudding and whipped topping?
Yes, I’ve made these dairy-free using plant-based pudding mixes and coconut whipped topping. Just check the labels on the ingredients.
Do I have to use clear cups?
Clear cups make the layers visible and more fun to look at, but any small dessert cups or jars work fine too.
Conclusion
Haunted Pumpkin Patch Cups are the perfect mix of creativity and flavor. I love making these for Halloween gatherings or just to get into the spooky spirit. They’re easy, festive, and always a big hit with both kids and adults.
PrintHaunted Pumpkin Patch Cups
Haunted Pumpkin Patch Cups are a fun and festive no-bake Halloween dessert made with chocolate pudding, crushed cookies, and candy pumpkins. A spooky-sweet treat that’s perfect for kids and adults alike!
- Prep Time: 10 minutes
- Cook Time: 0 minutes
- Total Time: 20 minutes
- Yield: 6–8 dessert cups
- Category: Dessert
- Method: No-Bake, Layering
- Cuisine: American
- Diet: Vegetarian
Ingredients
- 1 (3.9 oz) box instant chocolate pudding mix
- 2 cups cold milk (for pudding)
- 1 cup crushed chocolate sandwich cookies (like Oreos)
- 1 cup whipped topping or whipped cream
- Candy pumpkins (e.g., mellowcreme pumpkins)
- Optional: Green icing or candy vines for decoration
- 6–8 clear plastic cups or dessert jars
Instructions
- Prepare the chocolate pudding by whisking the pudding mix with cold milk according to the package directions. Chill until set (about 10 minutes).
- Crush chocolate cookies in a zip-top bag or food processor until they resemble fine “dirt.”
- In each cup, layer chocolate pudding and crushed cookies, alternating until the cups are nearly full. End with a layer of cookie crumbs on top.
- Add candy pumpkins to the top of each cup to create a “pumpkin patch.”
- For extra decoration, pipe green icing vines or leaves around the pumpkins.
- Refrigerate until ready to serve.
Notes
- Use orange-dyed vanilla pudding for a fun color twist.
- Add gummy worms or tombstone cookies for a full graveyard scene.
- Chocolate mousse or brownie crumbles make it extra rich.
- Wait to add the toppings until just before serving if prepping ahead to keep textures fresh.
- Great hands-on dessert for kids to assemble and decorate!
Nutrition
- Serving Size: 1 cup
- Calories: 210
- Sugar: 20g
- Sodium: 180mg
- Fat: 8g
- Saturated Fat: 4g
- Unsaturated Fat: 3g
- Trans Fat: 0g
- Carbohydrates: 32g
- Fiber: 1g
- Protein: 3g
- Cholesterol: 10mg


