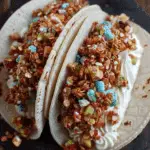
Fruity Pebbles Cheesecake Tacos are a colorful, fun, and delightfully sweet dessert that combines the crunch of cereal with creamy cheesecake filling—all shaped into playful taco shells. It’s the perfect treat to brighten any celebration or to simply indulge in a nostalgic twist on dessert.
Why You’ll Love This Recipe
I love how this recipe brings together whimsy and flavor in one delicious bite. The vibrant Fruity Pebbles shells give a satisfying crunch and fruity taste, while the no-bake cheesecake filling is smooth, rich, and incredibly easy to make. These tacos are a conversation starter at any party, and they’re just as fun to make as they are to eat.
Ingredients
(Here’s a tip: Check out the full list of ingredients and measurements in the recipe card below.)
-
Fruity Pebbles cereal
-
Mini marshmallows
-
Unsalted butter
-
Cream cheese
-
Powdered sugar
-
Vanilla extract
-
Heavy cream
-
Fresh fruits (strawberries, blueberries, kiwi, etc. – optional for topping)
Directions
-
I start by melting the butter and marshmallows together in a saucepan over medium heat until smooth.
-
Then I stir in the Fruity Pebbles cereal until it’s fully coated with the melted mixture.
-
While the mixture is still warm, I press it onto a lightly greased taco mold or shape it around a rolling pin to form taco shells. I let them set and harden slightly.
-
In a mixing bowl, I beat the cream cheese until smooth, then add powdered sugar and vanilla extract.
-
I whip the heavy cream separately until stiff peaks form, then fold it gently into the cream cheese mixture to make the cheesecake filling.
-
Once the taco shells are set, I pipe or spoon the cheesecake mixture into each shell.
-
For a finishing touch, I top each taco with fresh fruits or a sprinkle of extra Fruity Pebbles.
Servings and timing
This recipe makes about 6 to 8 cheesecake tacos, depending on the size of the shells. I usually prep and assemble everything in about 30 minutes, and then chill them for an additional 30 minutes before serving. So, total time is around 1 hour.
Variations
Sometimes I like to swap the Fruity Pebbles for Cocoa Pebbles to give the tacos a chocolatey twist. For the filling, adding a swirl of strawberry or blueberry jam makes a fruity surprise. If I’m going for extra indulgent, I drizzle some melted white chocolate or use a flavored cream cheese like strawberry or honey pecan.
Storage/Reheating
I store these cheesecake tacos in the refrigerator in an airtight container. They stay fresh for about 2–3 days, though the shells will start to soften over time. I don’t recommend reheating them, since the cereal shells are meant to stay crisp and the filling is no-bake.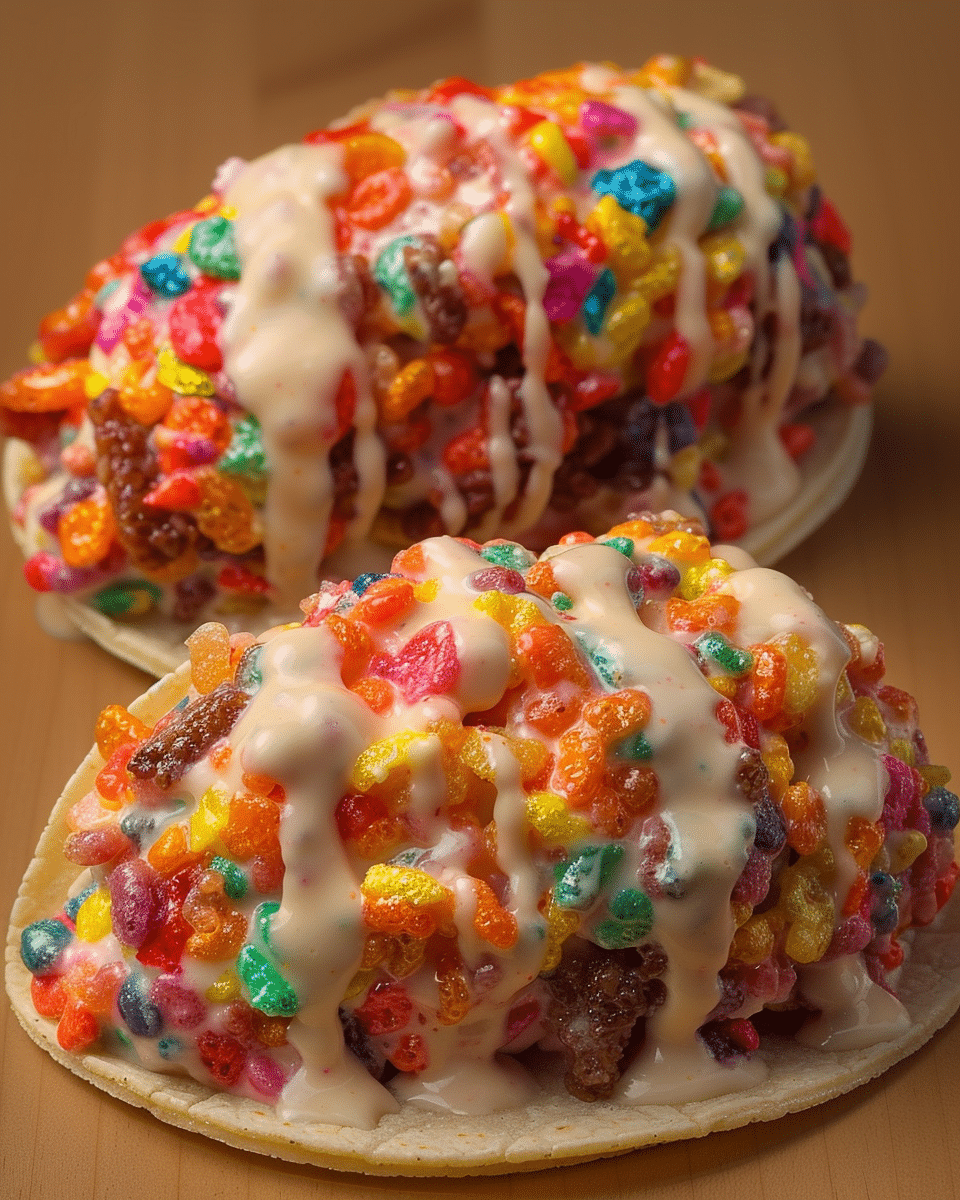
FAQs
How do I keep the cereal shells from falling apart?
I make sure to press the cereal mixture firmly when shaping it, and I let it cool completely before filling. A little patience goes a long way.
Can I make these ahead of time?
Yes, I often make the shells and filling separately a day ahead, then assemble them shortly before serving to keep them fresh and crisp.
Can I freeze these cheesecake tacos?
I don’t recommend freezing them, as the cereal shells can get soggy when thawed. The filling, however, can be frozen separately.
What if I don’t have a taco mold?
I’ve used a rolling pin, the back of a muffin tin, or even shaped them by hand. Anything that helps curve the shells while they cool will work.
Can I use store-bought whipped topping instead of heavy cream?
Yes, I sometimes use whipped topping for convenience. It makes the filling slightly lighter and quicker to prepare.
Conclusion
Fruity Pebbles Cheesecake Tacos are the perfect mix of fun and flavor. I love making them for birthdays, holidays, or just because. They’re a sweet treat that always puts a smile on faces—and once I try them, it’s hard to stop at just one.
PrintFruity Pebbles Cheesecake Tacos Recipe
Fruity Pebbles Cheesecake Tacos are a fun, no-bake dessert that combines crunchy Fruity Pebbles cereal taco shells with a creamy cheesecake filling. These colorful treats are perfect for parties, birthdays, or any festive occasion. Easy to make and even more fun to eat, they’re a whimsical twist on classic cheesecake.
- Prep Time: 30 minutes
- Cook Time: 0 minutes
- Total Time: 1 hour
- Yield: 6–8 cheesecake tacos
- Category: Dessert
- Method: No-Bake
- Cuisine: American
- Diet: Vegetarian
Ingredients
- 3 cups Fruity Pebbles cereal
- 2 cups mini marshmallows
- 2 tablespoons unsalted butter
- 8 oz cream cheese, softened
- 1/2 cup powdered sugar
- 1 teaspoon vanilla extract
- 1/2 cup heavy cream
- Fresh fruits (strawberries, blueberries, kiwi, optional for topping)
Instructions
- Melt butter and mini marshmallows in a saucepan over medium heat until smooth.
- Stir in Fruity Pebbles cereal until evenly coated.
- Shape the mixture into taco shells using a greased mold, rolling pin, or muffin tin. Let them cool and set.
- In a mixing bowl, beat cream cheese until smooth. Add powdered sugar and vanilla extract.
- In a separate bowl, whip heavy cream until stiff peaks form. Fold into the cream cheese mixture to make the cheesecake filling.
- Pipe or spoon the cheesecake filling into the cooled cereal taco shells.
- Top with fresh fruits or extra Fruity Pebbles for garnish.
Notes
- For a chocolatey version, substitute Fruity Pebbles with Cocoa Pebbles.
- Swirl in fruit jam (like strawberry or blueberry) for extra flavor in the filling.
- Drizzle with melted white chocolate for a decadent twist.
- Use whipped topping instead of heavy cream for a quicker prep.
- Store unassembled components separately if prepping ahead.
- Not freezer-friendly due to potential sogginess in cereal shells.
Nutrition
- Serving Size: 1 taco
- Calories: 280
- Sugar: 22g
- Sodium: 160mg
- Fat: 15g
- Saturated Fat: 9g
- Unsaturated Fat: 5g
- Trans Fat: 0g
- Carbohydrates: 32g
- Fiber: 1g
- Protein: 3g
- Cholesterol: 35mg

